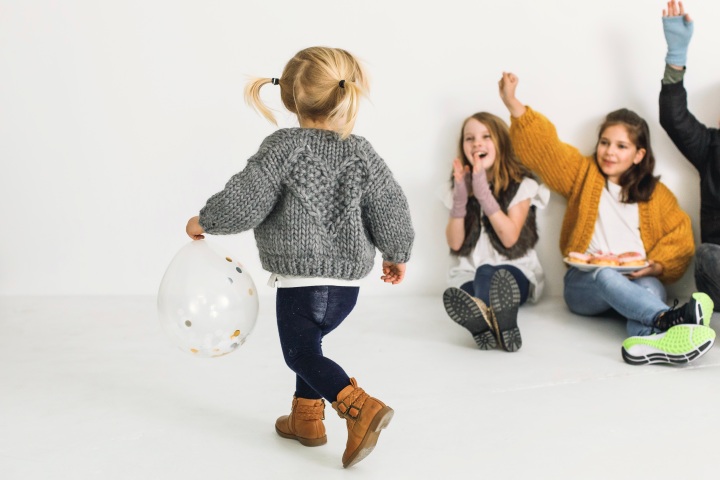
Kid wearing Mini Love Bomber knitting pattern
comment 0

Moving On

Woman wearing a chunky hand knit cardigan

I’ve set up shop over at Purl Foundry!

All these years of creating my own wardrobe has been incredible and it’s not over yet. I’ve launched Purl Foundry, a knitting pattern brand with on-trend designs and plenty of video tutorials for beginner knitters.

Knitting your first sweater isn’t as difficult as you might think and the satisfaction level is through the roof.

Come on over and check it out! I’m just a dm away if you need a hand.

comments 3

Midi Skirt by Pattern Easy

IMG_5376

Pattern Easy is a Russian pattern brand and while everything is written in Russian, as you’d expect, it’s not completely out of reach for us foreigners.

I utilised Google Translate to muddle my way through (seam allowances aren’t included in the pattern). This particular skirt translated to be “Mid-skirt was a smell”. I’m sure that’s not what Pattern Easy actually intended, but apparently ‘wrap’ and ‘smell’ are similar in Russian!

IMG_5423.jpg

I made this version with a cotton blend fabric from The Fabric Store. It’s mid-weight with incredible structure and the yellow almost looks like mustard in low light and then primary colour in bright light! It’s awesome.

IMG_5423.jpg

The only change I made was to create more of an angle on the centre front edges. Only because it was sitting mostly closed and I wanted more leg to show for a less frumpy look.

I also attached the underneath layer to the pocket bag at the centre edge because it flapped open. A lot. Like, indecently so. But it’s all good now.

IMG_5390.jpg

All in all, it’s a good pattern and the result was exactly what I’d hoped for. I don’t think I’ll make another, but it was really nice to make something different from my usual style. It’ll certainly get some good wear for years to come!

comments 4

Push Up Bra by Merckwaerdigh

I am so excited about this Push Up Bra pattern by Merckwaerdigh.

Plunge Bra by Merckwaerdigh | Offsquare.com

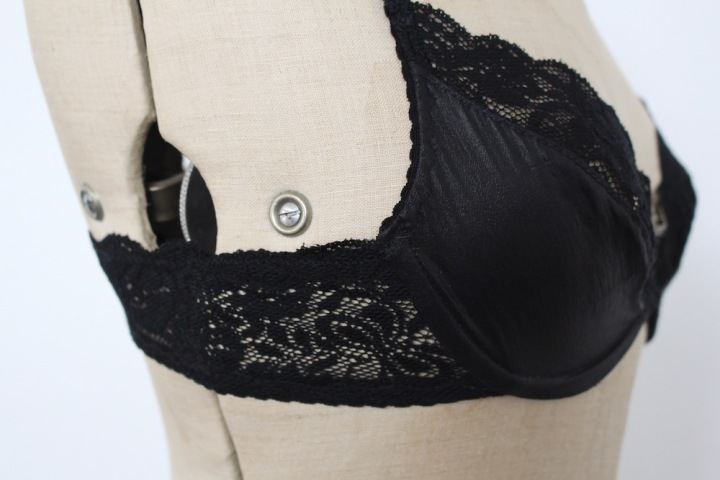
This is a partial band bra with plunge underwires and two-part cup with diagonal seam. It comes with optional padded inserts that you can make for extra boost. I skipped those. The floral version was made with a kit from Lingerie Findings, using her stretch satin on the cups, lined with sheer cup lining.

Plunge Bra by Merckwaerdigh | Offsquare.com

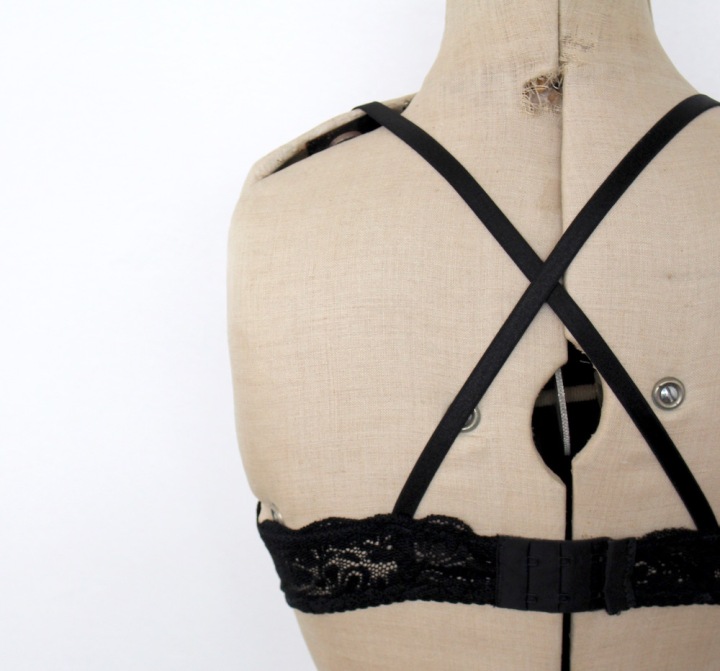
I broke the rules on the black version by using unlined, stretch lace on the upper cup. I’m not sorry. It’s divine to wear! The lower cup is made with two layers of woven polyester. The band was unlined stretch lace and picot elastic. I hope it holds up to wear and tear, but it’ll be an experiment in durability. I also crossed the straps at the back so that I can wear it under racerback tops, like my Ella.

Plunge Bra by Merckwaerdigh | Offsquare.com

Construction was uncomplicated. In fact, if you’ve made bras before, you can mostly follow your nose. Just don’t forget to add your seam allowances to the pattern pieces. Also, don’t be put off by the reviews saying how hard these patterns are. It’s not ideal for a first time bra-maker. But fine for anyone else confident behind the sewing machine.

Plunge Bra by Merckwaerdigh | Offsquare.com

I’m curious about her sizing though. All sizes are a B cup (graded up for each band size) and to make larger or smaller cup sizes, you alter the band length. It’s an interesting concept. Being a B cup myself, I’m keen to make a bra for someone with a larger cup, just to test this out! It feels quite controversial. I’ve always just assume the cup size changed too. I love this about trying a variety of designers though. You learn new things.

Plunge Bra by Merckwaerdigh | Offsquare.com

The Road to Success

For months, I’ve been attempting different patterns in the hunt for one that fits well. Two were abysmal failures. After seven trials and tweaks of each, I threw them out.

But this one fit me straight away and it’s a major victory. I cannot tell you what a relief this is for my sewing mojo. I was falling into a pit of despair fuelled only by sheer determination and espresso martinis (the latter wasn’t so bad. I’ll keep those going. You can find the recipe at the end of this post, just in case your sewing journey asks for it too).

Plunge Bra by Merckwaerdigh | Offsquare.com

I don’t blame those other patterns. Plenty of people love them. It’s just that every shape is different and I don’t think they were drafted for my figure. By that, I mean the ‘golf-ball-in-a-sock’ shape.

Plunge Bra by Merckwaerdigh | Offsquare.com

This bra lifts and supports beautifully. For the first time in my life, I actually love the rack I was given. I love how it looks in a well-fitted bra. I love how it feels when not hidden behind foam. I love that I can make more! Hubby isn’t complaining either.

Plunge Bra by Merckwaerdigh | Offsquare.com

I can see why bra-making is so big right now. The win feels insanely good, precious fabric scraps go a long way and there’s a lot of scope for creative licence.

You just need to find the pattern that’s right for you. That part can be rough. I recommend stubbornness, cocktails and Netflix.


Espresso Martini Recipe

30ml Espresso Shot

30ml Vodka

15ml Sugar Syrup (one part water, one part sugar)

Pour into a shaker with a good handful of ice cubes and shake til icy cold. Pour through a fine sieve into a chilled glass.

comments 6

Sway Top by Papercut Patterns

I’ve been gushing over this sulphur yellow linen for weeks. My wardrobe needs more colour diversity and this is the perfect antidote.

Sway Top by Papercut Patterns | Offsquare.com

Sourced from the lovely Emma at Miss Maude Sewing, this linen has a slub texture and the yellow has the slightest of green undertones.

Sway Top by Papercut Patterns | Offsquare.com

Bold fabric calls for a dramatic shape. So I used the Sway Dress pattern by Papercut Patterns* as a base. I cropped the short dress length (keeping the curved shape for the hem), removed 1cm from the centre front and back pieces so I could cut them on the fold (instead of having centre seams) and skipped the facing altogether.

Sway Top by Papercut Patterns | Offsquare.com

Those were the only pattern alterations. Then I got a little creative with the assembly.

I cut two front and two back pieces, making one piece of each 1.5″ shorter than the other (they will be my top layer). Mindful that the double layer of linen could be bulky around the neckline and arm holes, I used a lawn cotton for the upper half of the bottom layer. I then cut the rest of the layer from linen, serged the top edge and attached the cotton and linen to form a cohesive bottom layer (shown in the photo below). Then I attached this layer to the upper layer just as you would the facing. I think it worked really well! The fabric isn’t bulky, but I still get the double hem effect that I wanted.

Sway Top by Papercut Patterns | Offsquare.com

I love it. The colour, the shape … everything. And, the top is reversible! You can wear the V-neck at the front or back, depending on your mood. I would have taken photos to show you, but the beach was way too public to be awkwardly adjusting clothes. As if taking blog photos isn’t weird enough!

Sway Top by Papercut Patterns | Offsquare.com

I’m seriously considering another Sway top in a drapey rayon or cotton. Something light and floaty for those sticky summer days.

Ah, I can smell the sandfly repellant already.

Sway Top by Papercut Patterns | Offsquare.com

*This is not a sponsored post, but I do work part-time for Papercut Patterns. See my About page for details.

comments 4

Pancake Blouse by Waffle Patterns

There’s just enough winter left here to enjoy a cosy flannelette shirt and I adore this fun, boxy version by Waffle Patterns.

Pancake Blouse by Waffle Patterns // Offsquare.com

This is the Pancake Blouse, which actually comes as a straight hem, hip-length pattern. But Yuki also provides a free downloadable hack for this high-low option and it completely changes the look! I love it.

Pancake Blouse by Waffle Patterns // Offsquare.com

I made mine with cotton flannelette and while it would look great in plenty of other fabrics, I just loved Yuki’s sample too much to veer from that look!

Whatever you do use, just make sure your fabric isn’t too thick or heavy so you retain drape and the gathers don’t get too bulky.

Pancake Blouse by Waffle Patterns // Offsquare.com

My Pancake Blouse came together in just 3 days and was straight-forward, aside from pattern matching dilemmas on the placket which was completely self-inflicted. Ah, perfectionism.

The plaid must have some give too because I had to ease the front yoke into the placket to make it fit again. Thankfully, this stuff is very forgiving and I’m mostly convinced it was my own fault.

Pancake Blouse by Waffle Patterns // Offsquare.com

My only hesitation is that the cuffs are just a band and rolling up the sleeves is a bit of a fiddle. They do push up to my elbows no problem, but if you’re a sleeve-roller and intend to wear it that way a lot, you may want to consider a hack of your own to add cuff buttons and a split. The flip side is, easier cuffs means more beginner friendly, so it could be a great introduction to shirts for someone who hasn’t made one before.

All up, I’m a huge fan of this pattern and totally recommend it for your autumn/winter sewing list. It’s a fun twist on the traditional shirt but less restricting and plain. Hooray!

Pancake Blouse by Waffle Patterns // Offsquare.com

comments 11

Mila Shirt 2.0

Well, I couldn’t help myself. I had to make another Mila Shirt!

Mila Shirt by Itch to Stitch // Offsquare.com

I love my red Mila and it turns out casual shirts are my jam. Structured yet good for everyday wear, which pretty much sums up my current style.

This time I used white cotton lawn and I’m so happy with the fabric choice. It’s light but holds shape well, giving me that “casual structure” vibe.

Mila Shirt by Itch to Stitch // Offsquare.com

I also pre-washed my interfacing after the other shirt began to bubble around the collar and cuffs. Turns out interfacing needs pre-washing! Who knew? I just gave the lawn interfacing a gentle soak for 10 mins and then hung it up to dry after rinsing. A tiny amount of grit did come off on my fingers (so don’t be rough when washing!), but it still fused as usual and hasn’t bubbled at all yet.

Mila Shirt by Itch to Stitch // Offsquare.com

Changes

This time I extended the button placket all the way down to the hem. Just for a more structured feel. It was really easy to do too. I understood from my first version how the placket went together and essentially cut that in half and made it the same length as the shirt front.

Mila Shirt by Itch to Stitch // Offsquare.comI also reversed the pleat at the centre back out of personal preference and I love this about sewing. We get to tweak the tiny details as well as the big ones.

Mila Shirt by Itch to Stitch // Offsquare.com

I’m seriously loving this pattern. Maybe I’ll try a fun little print for the next one, like polkadot. Or wide stripes. Ah, the options!

Katrina x

comments 16

Cocoon Cardi by Jalie

Cocoon Cardi by Jalie | Offsquare.com

It’s nearly halfway through winter here in NZ and I’m hankering for more cosy, casual layers.

Introducing, the Cocoon Cardigan by Jalie. It’s slouchy, relaxed and sews up super quick, pairing perfectly over my growing collection of merino tops .

Cocoon Cardi by Jalie | Offsquare.com

I was feeling rebellious when I made this and ignored the fabric recommendations, opting instead for a mid-weight knit with a questionable amount of stretch. Ignoring those recommendations is usually a terrible idea, by the way. I wouldn’t recommend it and I questioned that decision the entire way through construction.

Fortunately, I love the cardi now anyway. That was lucky.

Cocoon Cardi by Jalie | Offsquare.com

Here’s the exceptional part: This pattern comes in a whopping 27 sizes. 27! You can make this cardi for everyone from a two-year old, right through to an adult 22 plus-size.  Impressive!

I’ve never seen such a range before. Must have been a pattern-grading nightmare to put together, but all that work means no-one has to miss out and that’s pretty cool.

Cocoon Cardi by Jalie | Offsquare.com

The Cocoon Cardigan is a great pattern and simple to put together. The sleeves are part of the body, so there’s no setting in or easing of sleeve heads. You just sew the shoulder/sleeves down an outside seam, then the side seams before finishing it all off with the cuffs and band. Quick. And. Easy.

Cocoon Cardi by Jalie | Offsquare.com

One small change I made was to add in some bias binding along the back neckline for stability. It could be that I just made a size too big, but the cardi often slipped off my shoulder and this addition helps to keep the neckline firm. No biggie. I often do it with my merino tops too.

Apart from that, it was straightforward and the relax fit of the cardigan means you shouldn’t encounter any fit issues or complications.

Cocoon Cardi by Jalie | Offsquare.com

I definitely want to make more. Next time it’ll be in something softer though and Jalie’s sample photo in a colourful knit looks great for summer.

And I’ll definitely be paying attention to the fabric recommendations this time.


comments 9

Mila Shirt by Itch to Stitch

As a teenager, I once bought a drab nude-coloured shirt from an op-shop and dyed it army green. I didn’t yet understand the challenges of dying polyester, so that dye always blotched and ran in the rain. But the shirt fit like a dream and I wore it anyway, blotches and all.

Mila Shirt by Itch to Stitch | Offsquare.com

It was with that shirt in mind that I went hunting for a pattern … minus the running dye.

I wanted feminine, dartless, and relaxed and this Mila Shirt by Itch to Stitch fit the bill. I’m rather smitten! It’s a half-placket blouse with two collar options, back yoke, sleeve tabs, and relax fit.

Mila Shirt by Itch to Stitch | Offsquare.com

My version is made with raspberry coloured cotton with silky properties, found at a local designer outlet for a bargain $6 per metre. It’s tricky to capture the colour just right, but think red with rich pink undertones.

Mila Shirt by Itch to Stitch | Offsquare.com

One feature I’ve never seen in other patterns is the option to choose your bust size along with your clothing size. An attractive option if you often compromise over-all fit for bust fit in shirts. So most of us then. Savvy!

Mila Shirt by Itch to Stitch | Offsquare.com

The only change I made was to lop 6cm off the length. In hindsight, it was perhaps ambitious and I’ll opt for a more conservative 3cm next time, if any.

I also french seamed throughout and attached the yokes in a different order, just because I’m more used to it that way. I’m sure the instructions work fine too though.

Mila Shirt by Itch to Stitch | Offsquare.com

I consider this a big project for me. It’s got button holes, a collar, placket and cuffs … all fresh challenges  or, in the case of button holes, techniques I need to practice more. I enjoyed that challenge though and I’ll definitely be making more Mila Shirts. Discovering I could not only do those techniques, but be happy with the end result has been a massive boost to my sewing confidence!

Mila Shirt by Itch to Stitch | Offsquare.com

The Mila Shirt is a great pattern and the instructions are well written. I totally recommend this if you’re on the fence about it. Because of all the design elements, I’d have to class this pattern as advanced level. Certainly not advisable for beginner sewers and an intermediate sewer might pull it off, but you’ll want to be friends with your buttonholer first.

Mila Shirt by Itch to Stitch | Offsquare.com

Also, take your time. This is the kind of make you want to savour and spend time doing each step really well. Bad stitching or careless placement will be obvious, so consider it a long-term make (this took me 2-3 weeks, doing just an hour or two a day) and enjoy the process of ‘making’ rather than rushing to finish.

Mila Shirt by Itch to Stitch | Offsquare.com

I am so in love with this make! It feels so me and is structured yet casual. Perfect.

comments 6

5 Ways to Find Your Sew-Jo

5 ways to find your sew-jo | Offsquare.com

We all go through phases where our enthusiasm for sewing dims. It’s when you look at your sewing machine and think

“Ugh, I just can’t be bothered”

But you know it’s your happy place and you want to get that joy back. So how? Where did your sew-jo even go?

Sew-jo is a play on words, combining ‘mojo’ with ‘sewing’ to describe a drive for sewing. I don’t know which witty person came up with it, but kudos to you, my friend. Very clever. It’s totally normal for this drive to ebb and flow, so don’t be too concerned when you hit an ebb.

There are, however, things you can do to help trigger your sew-jo again. Here is a list of

5 WAYS TO GET YOUR SEW-JO BACK:

5 ways to find your sew-jo | Offsquare.com

1.  Ditch The Stress

Busy-ness and stress will squash creativity. When you switch into survival mode, your brain ditches creativity to cope. But it also works the other way where creativity can ease stress. It’s a catch-22. If you’re stressed, you need to relax and get creative, but your brain is swamped and all you can muster is sitting on the sofa to stare at the TV.

The key here is to just start making. Find something that doesn’t involve too much creativity, but will just get you sewing. Try a tried-and-true pattern that you know will work and won’t involve a lot of thinking. Be sure to use a fabric that makes you happy and you’ll love to wear! Your creativity may be stifled, but the act of sewing itself may help trigger your sew-jo again. Absorbing yourself in something else for a while may even help you find creative solutions to your stress and could help you sleep better.

2.  Project Satisfaction

Maybe your last make(s) left you feeling flat? It didn’t turn out like you’d expected and you missed that rush of satisfaction that we all crave. I’ve been there plenty of times, especially when I first started out and most of my sewing ended up in the bin.

What you need is that buzz. That rush of pride in a garment that fits like a dream. This is about self-esteem and feeling good about your abilities. You need a guaranteed winner. Go for a basic style top or dress pattern; a real simple design in a relaxed fit. Even better, choose one enjoying renowned success on social media. That way, you can see how it looks on a lot of different body shapes and find out what any issues are before you start.

Also, drop the perfectionism. We are our own worst critics and to be honest, most of the time your garment is just fine! Let your ‘failure’ sit for a month before trying it on again and you may find the issues aren’t really a big deal.  Or you might be more willing to unpick and try fix the errors by then. If nothing else, you’ve had a learning curve and that’s valuable. A success in itself! It’s often the best way to learn any lessons, be it sewing or life, so take the lesson and move forward.

5 ways to find your sew-jo | Offsquare.com

3.  Seasonal

Every winter, my sew-jo fades and I discover a compulsion to knit instead. I don’t want to sit in a cold room, chilly toes beneath a sewing table while the fire burns in another room. I want to be tucked up on the couch with a blanket, Netflix and a creative project between my fingers. Go with that.

If knitting isn’t your jam, try practicing some open-work (illustrated below), hand-stitching or even mending. If those fingers want to make, let them make. You can get the sewing machine out again when the sun returns.

5 ways to find your sew-jo | Offsquare.com

4. Short Term vs Long Term Sewing

There’s nothing like a gritty sewing challenge. One where you can learn new techniques and stare a scary zip insertion in the eye. But too many of these makes in a row can be taxing, so be sure to intersperse them with easier, short-term makes for quick gratification. I like to call those ‘palate-cleansers’. A small make between larger projects to refresh my joy of sewing.

It goes the other way as well. Too many quick and easy makes can leave you bored and unstimulated, so make sure you challenge yourself occasionally with a new technique or two. Spice up your sewing and reap the satisfaction of tackling a new skill. Just imagine all the options that will open up to you when you learn how to sew a button-hole or an exposed zip!

5 ways to find your sew-jo | Offsquare.com

5. Roll With It

Maybe you just need a break. We can get in too deep sometimes and it might be that you just need some air. If sewing is an activity you usually love, then trust it will come back next time you find a need in your wardrobe or fashion-envy on Pinterest. Give yourself the time and space to pursue other interests and when inspiration strikes, your sew-jo will let you know. Whatever led you to sewing in the first place, will likely lead you there again in time.

Read a book, do some gardening, go for a walk … if it relaxes you, then do it. Because isn’t that why we sew? To find that calm place where we can lose ourselves while the rest of the world momentarily melts away? It’s good for the soul. For our well-being. So if you find this escapism elsewhere for a while, that’s okay. Your sewing machine will still be there when you return.

5 ways to find your sew-jo | Offsquare.com

comments 14

Starboard Jeans by Papercut Patterns

I’ve finally joined the jean-making revolution! And a mighty fine revolution it is.

Starboard Jeans // Offsquare.com

These are the Starboard Jeans by Papercut Patterns*. A mid-rise, slim fit jean with ankle and front zip details. I’m loving the way this mid-rise pulls in the tummy and it pairs beautifully with crop tops (still modest, but gives you that cute silhouette).

Starboard Jeans // Offsquare.com

If you haven’t made jeans before, I know the prospect can seem daunting. I wouldn’t recommend these as a beginner project, but I do think an intermediate sewer could tackle this and an advanced sewer would knock it out of the ball-park.

Starboard Jeans // Offsquare.com

I wish I could tell you what weight denim I used. Sadly, I bought it at Spotlight and the label only said “assorted denim”. Most unhelpful, Spotlight. But I can tell you it’s a relatively heavy denim with a bit of stretch. My theory was that if I was going to the work of sewing jeans, they’d better last me a few years!

Alteration-wise, I did take a wedge out of the back waistband to accommodate my sway-back, cinch in the side and crotch seams slightly for a snug fit and taper the ankles more. Next time, I’ll take out that back wedge before cutting the pattern pieces, but I think the other changes are best done as you go. It’s easier to cinch a seam in than make one larger.

Starboard Jeans // Offsquare.com

Sewing Tips

  • I recommend making a test version first. You can skip a lot of the details, just cut the essentials so you can gauge the fit.
  • You’ll want to choose denim with some stretch in it.
  • These pants are fitted, which means you need to pay attention to sizing. My waist is a size bigger than my hips (which explains why shopping for jeans is such a nightmare), so I graded between sizes and am so pleased I did. Your fit will be better for taking that extra time at the start.
  • I opted to cinch in the side seams at the ankle more for a skinny-jean fit rather than the designed slim-fit. Just personal preference and easily done by taking in both outer and inner leg seams in equal amounts. You can do this for any adjustments along the legs, otherwise the seams may twist.
  • Have fun with the pocket linings! Lightweight fabric is key though, so they don’t create a visible line through your finished jeans.
  • Consider skipping the thread guide above the needle for your topstitching thread. That stuff is thick and your machine might cope better? It worked for me anyway. That and using a Cordonnet needle on my machine whenever I used that thread. It has a longer eye than standard needles and allows the heavy thread to pass through easily.
  • It’s probably a good idea, for your first attempt, to skip the topstitching on the inside legs. It’ll make any adjustments that much easier.

Starboard Jeans // Offsquare.com

Jean construction not as hard as you might think, but very rewarding and strangely addictive. I expected to be thoroughly over sewing jeans after this, but I’m already dreaming of my next pair!

Katrina x

*see the ‘About’ page for my Papercut Patterns disclaimer.